



To finish a set of geometric nails, you paint a straight white shape, fill its centre with colour and frame it with silver triangles, adjusting them until both sides match. After sealing, a stud is set into a small bead of acrylic and a few stones are placed in sealer gel across the set.
Update: the video uses white acrylic paint, which we no longer stock. The products list uses Snow White gel polish instead, applied in thin layers and cured. Tarnished Silver stands in for the silver sparkle gel, and Party Pants is not in our store.
In Part 4, Kirsty Meakin from Naio Nails finishes her geometric gel polish design. This geometric nail art tutorial keeps the same theme across all five fingers and shows where to place embellishments for a balanced look.
At a Glance
- Design: a silver-framed colour panel with matching triangles, one stud and a scattering of stones
- Artist: Kirsty Meakin
- Technique: freehand gel line work, then embellishments fixed with acrylic and sealer gel
- Key products: Snow White and Tarnished Silver Gel Polishes, Crystal Clear Acrylic Powder, AB Crystals, Naio Nails Mega Gloss
- Video length: about 7 minutes
Why You'll Love These Geometric Nails
- Silver frames the colour and the triangles.
- Matching triangle sizes on both sides.
- A stud and stones add a little sparkle.
- Stones sit securely in mega gloss sealer gel.
Products Used in This Video


How to Finish Geometric Nails with Studs and Stones
1. Add the white
Start with a little white gel, keeping the theme with everything nice and straight.
2. Add the colour centre
Use the colour gel in the middle of the white as an art medium, and cure.

3. Frame with silver
Use silver to frame the colour and to edge the top triangle. Add silver triangles, adjusting them until both sides are the same size. Cure and clean the gel residue off the triangles.

4. Add white detail
Use a little white gel on the silver triangles, in a thin layer, and cure.

5. Seal
Seal with mega gloss, covering all of the design and sweeping over the tip to cap it. Cure for a minute and add a little cuticle oil.
6. Plan the embellishments
Look at the whole design on all five fingers and decide where to put stones or embellishments. Wipe over with gel residue remover so there is no oil.

7. Attach the stud
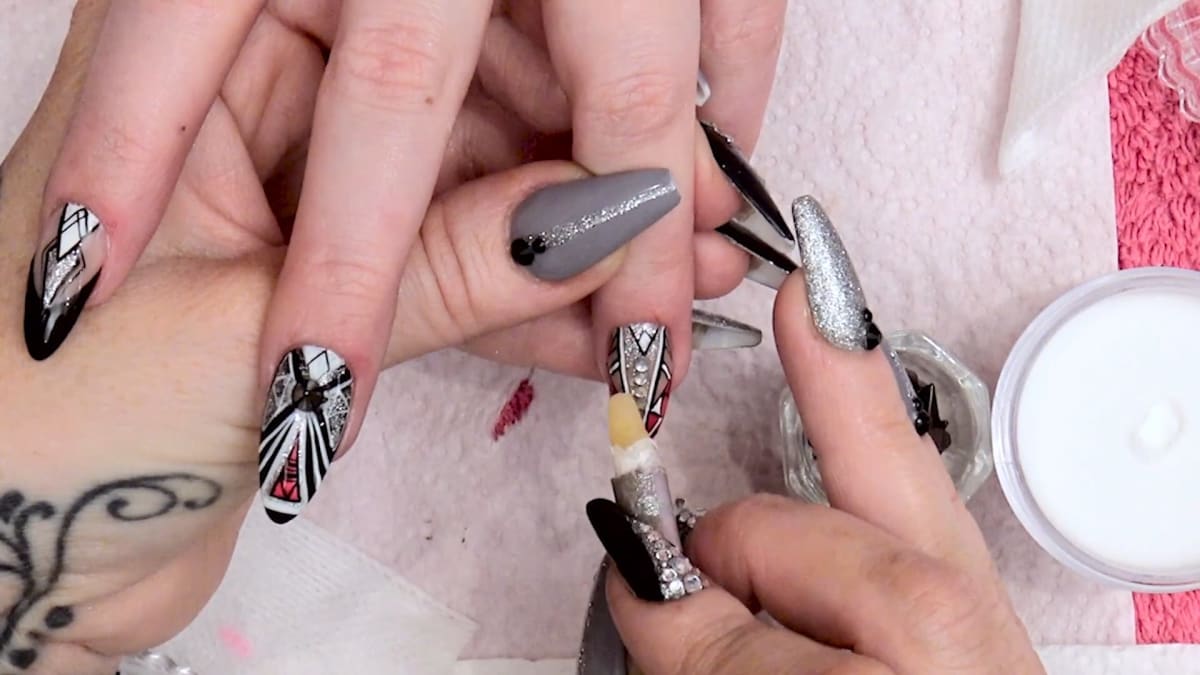
Put a small bead of acrylic in the middle, place the stud on it and gently pat the acrylic round the edge so it is neat and holds the stud on. Seal around the outside with mega gloss sealer gel.
8. Add stones
Put mega gloss sealer gel down the centre of another nail and place the stones on. You do not need a lot. Place one stone to finish another nail and one at the back of the next. Cure for one minute in an LED lamp, and add more cuticle oil if needed.

Pro Tips
- Adjust the triangles until both sides match.
- Wipe off oil before attaching embellishments.
- You do not need a lot of gel for each stone.
Who Is This Design For?
Anyone who wants a full, coordinated nail set in a geometric style.
Ways to Make It Your Own
- Add or skip studs and stones.
- Choose another art medium colour.
- Change the triangle size.
Aftercare
Apply cuticle oil regularly.
Frequently Asked Questions
How do you finish geometric nails with studs and stones?
Seal the cured design with top coat, wipe off any oil, set the stud into a small bead of acrylic and seal around it, then place stones into sealer gel on the other nails and cure.
How do I attach the stud?
Use a small bead of acrylic and seal around it with mega gloss sealer gel.
How do I keep the triangles matching?
Keep adjusting them until you have the same size on both sides.
Why wipe before adding stones?
So there is no oil on the nail.
How do I decide where the stones go?
Look at the whole design across all five fingers first, then choose where a stud or a stone will balance the set.
How much gel does each stone need?
Not a lot. A little sealer gel holds the stone, and it is cured for one minute in an LED lamp.
Give Geometric Nails a Try
Watch the video above, and see Parts 1 and 2 for the earlier nails.


