



Transparent freehand nails combine a see-through sculpted tip, a curved chevron smile line, pockets of silver sparkle and wavy black line art. Kirsty Meakin from Naio Nails sculpts the ballerina shaped nail on a form in clear acrylic, pushes a pattern into glitter acrylic with a dotting tool, covers it in clear and then paints black freehand lines around the pockets.
The freehand design is deliberately loose. The lines are meant to wobble, so this is a forgiving way to practise brush control on top of a properly sculpted nail.
Below is each stage in order, with the time to watch the main ones in the video.
At a Glance
- Design: a clear tip with a chevron smile line, sparkle pockets and black line art
- Artist: Kirsty
- Technique: sculpting on a form, dotting tool pattern, freehand painting
- Nail shape: ballerina
- Cure time: one minute for the sealer
- Key products: nail forms, clear, beige and silver glitter acrylic powders, Dotting Tool, Pinching Tool, Mega Gloss
- Video length: about 9 minutes 15 seconds
Why You'll Love These Transparent Freehand Nails
- A sculpted look with a clear section and a chevron smile line
- A pattern pushed out with a dotting tool
- Wavy freehand lines that forgive mistakes
How the Dotting Tool Pattern Is Made
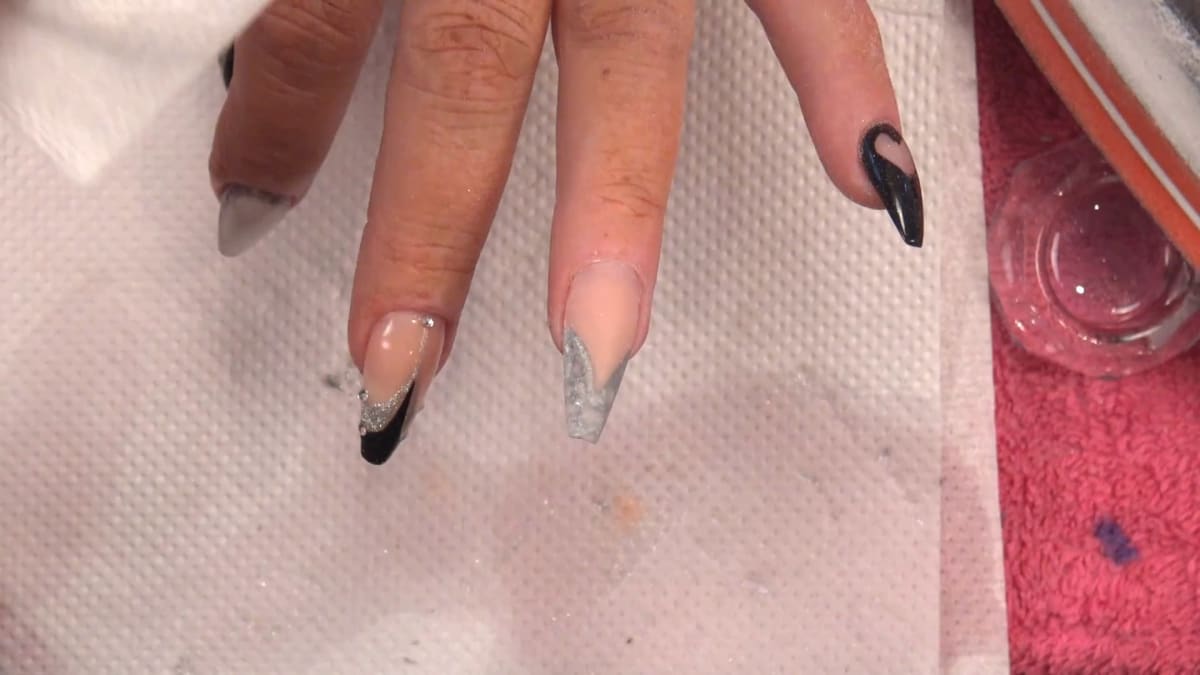
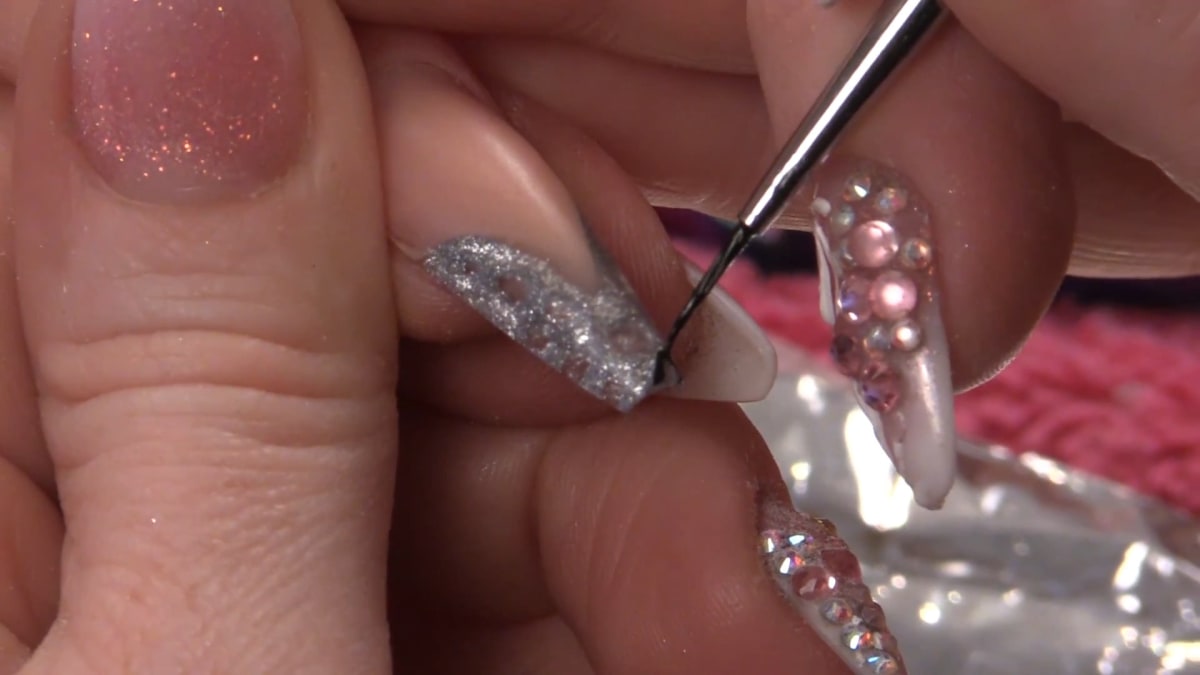
The sparkle is not painted on. A thin layer of silver glitter acrylic is laid down one side at a time, and as it starts to set, the nib of a dotting tool is dipped in powder and pressed into it. Each press pushes the glitter aside and opens a small gap, and a row of them forms the pattern.
A quite wet bead of clear then goes over the top and sits into those gaps. The result is a smooth nail with clear windows surrounded by sparkle, and those windows are the pockets the black freehand lines later trace around.
Products Used in This Video


How to Create Transparent Freehand Nails
1. Fit the form
Remove the surface shine, remove the tab from the sculpting form, pop it in the centre, roll and check the fit, closing the form so it fits right under the hyponychium.
2. Dehydrate and prime
Use Nail Prep Dehydrator, let it evaporate, then apply acid free primer.
3. Build the clear base
With Maximum Adhesion liquid, start with clear powder and make this part very thin, sliding up over the natural nail for strength, to create a ballerina shaped nail.
4. Build the smile line
Pop a bead of Natural Beige in the centre and tap the back of it. Concentrate on a curved chevron smile line, using the very tip of the brush to slide across. Add another bead for the cuticle area, pointing the finger down, and make sure the apex is built.
5. Make the pattern
Use Silver Sparkle Glitter, starting at one side, nice and thin, one side at a time. As it starts to set, dip a dotting tool in the powder and push out the pattern with the nib, then do the other side. Watch this step at 7:00
6. Cover with clear and pinch
Put a quite wet bead of clear over the top so it sits into the gaps, add a bead for strength and let it set a little. Apply the Pinching Tool for a nice C curve, then remove the form once set enough.
7. File and clean
File with the usual routine, side walls first, then buff and clean over with pure acetone, which melts the top layer ever so slightly. Clean underneath.
8. Add the freehand
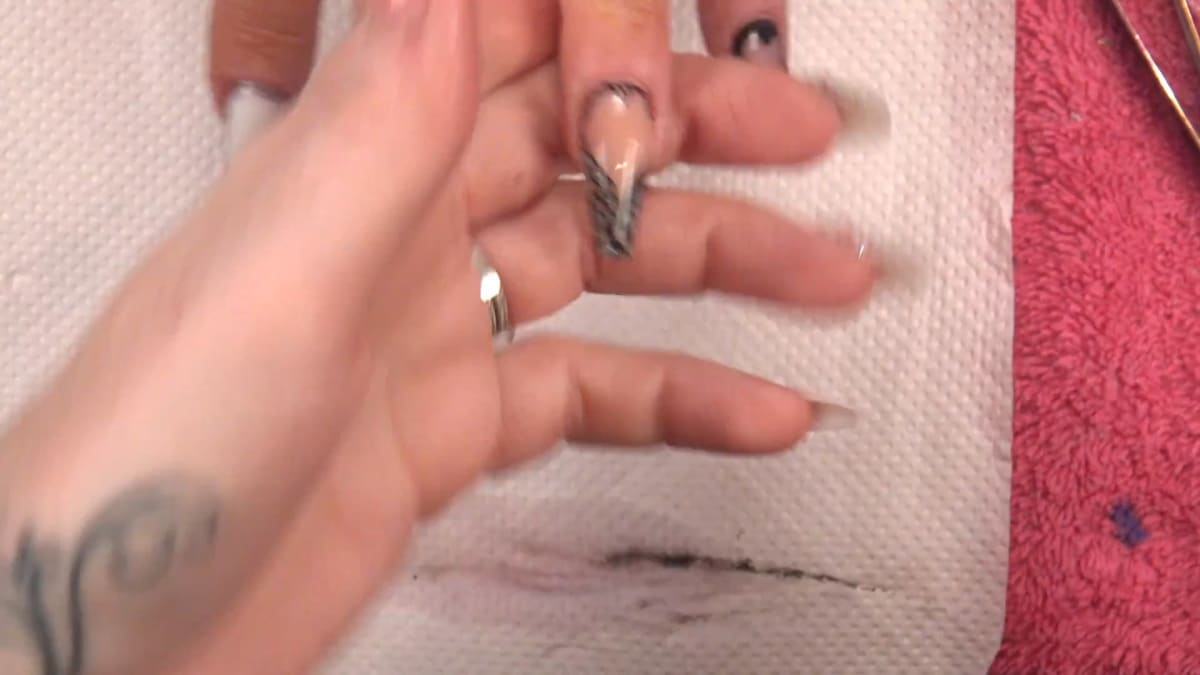
Use Serious Black gel and the Ultra Fine Detail Brush to go around the pockets really randomly. It does not need to be perfect and should be quite wavy. Add a similar pattern up the sides of the cuticle area. Cure the freehand in a thin layer. In the video Kirsty paints this in black acrylic paint and lets it dry. Watch this step at 8:20

9. Seal and finish
Seal with Mega Gloss, bouncing towards the cuticle without flooding it, and cure for one minute. Finish with cuticle oil all the way around. You could also create this with a clear tip. Watch this step at 9:10


Where to find each stage of the transparent freehand nails video
| Stage | Time |
|---|---|
| Sparkle pattern along the sides | 7:00 |
| Pushing out the pattern | 7:40 |
| Sealed close-up | 8:00 |
| Painting the freehand lines | 8:20 |
| Wavy pattern taking shape | 9:00 |
| Finished design | 9:10 |
Pro Tips
- Keep the clear section very thin at the start.
- Keep freehand wavy, not perfect.
- Do not flood the cuticle when sealing.
Who Is This Design For?
Acrylic users who want to practise sculpting with a unique clear and patterned finish. Transparent freehand nails are a good step up if you can already build a basic sculpted acrylic nail and want to add structure and art in one design.
Ways to Make It Your Own
- Use a clear tip instead of sculpting
- Change the freehand colour
Aftercare
Rub cuticle oil in all the way around to keep the nail looking its best.
Frequently Asked Questions
Can you use a tip instead of a form?
Yes, you could create this with a clear tip.
How do you make the sparkle pattern?
Push it out with the nib of a dotting tool dipped in powder, while the glitter acrylic is starting to set.
Does the freehand need to be perfect?
No, it should be quite wavy.
How do you fit a sculpting form?
Remove the tab, place it in the centre, roll and check the fit, and close it so it sits right under the hyponychium.
Why keep the first clear layer thin?
It is the see-through part of the nail. It is slid up over the natural nail for strength while staying very thin.
How long do you cure the Mega Gloss?
One minute.
Give Transparent Freehand Nails a Try
Watch the video above and follow along with Kirsty to create your own.


