



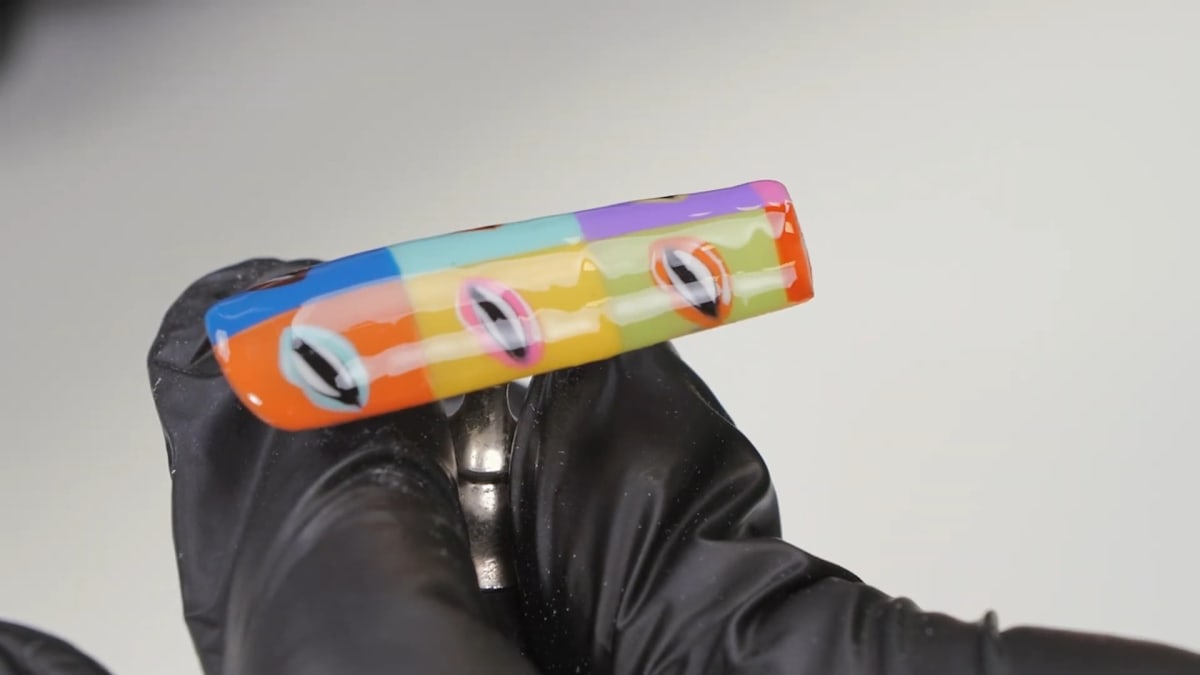
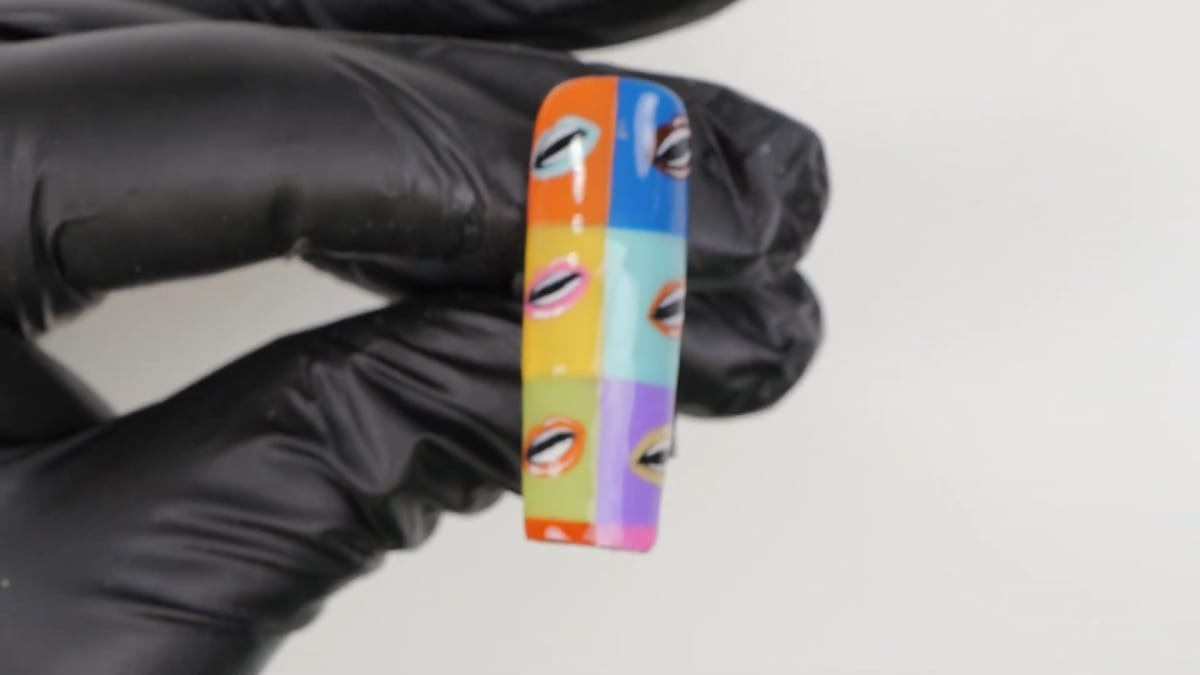
To make pop art lips nails, you map out a grid of equal squares on the nail, fill each square with a different bright colour, paint a small black eye shape in the middle of each for the open mouth, then outline it with lips in a contrasting colour and add white highlights and teeth. In this tutorial Steffi paints the full grid on one long nail.
It is a colourful, fun design inspired by Andy Warhol's famous paintings, where the same image is repeated in different colour combinations.
This bold Andy Warhol inspired nail art works best on a long nail, with plenty of room for lots of colour. Below you'll find the products, each step with its place in the video, and Steffi's tips.
At a Glance
- Design: pop art lips nails in a colour-block grid
- Artist: Steffi
- Technique: hand-painted gel polish with a fine detail brush
- Nail shape: long nail
- Key products: Snow White, Serious Black, Tangy Lime, Sun Quenched, Mimosa, Spa Day, Abyss, Wisteria Lane, Heart Breaker, Spill It, Ultra Fine Detail Brush - 0003
- Video length: about 15 and a half minutes
Why You'll Love These Pop Art Lips Nails
- A bright, colourful and fun design
- A simple grid keeps every square even
- A different lip colour in every square
- Highlights and teeth add detail
How the Pop Art Grid Works
The design depends on repetition, so the squares need to be the same size and the lips need to look alike. Steffi handles both with the order she works in. The grid is drawn first in white, as a guide that gets painted over. Each square then gets a thin layer of colour from a gel brush before being filled in with the detail brush, because gel goes on more easily over gel.
For the lips she paints the black centre of every mouth first, keeping the shapes a similar size, and only then adds the coloured lips around them. Starting from the middle is what keeps every set of lips consistent. Squares that are still wet are never allowed to touch, so the colour block edges stay clean.
Products Used in This Video


How to Create Pop Art Lips Nails
1. Map out the grid
Use Snow White and a fine detail brush to paint a straight line down the nail, then mark out the squares. Do not stress if it is not perfectly straight, as you will paint over it, but try to keep the squares an identical size. Cure for about 15 seconds. Watch this step at 0:40
2. Prepare the palette
Put out all the colours you will use on the palette: Tangy Lime, Sun Quenched, Mimosa, Spa Day, Abyss, Wisteria Lane, Heart Breaker, Spill It, Serious Black and Snow White. Watch this step at 5:00
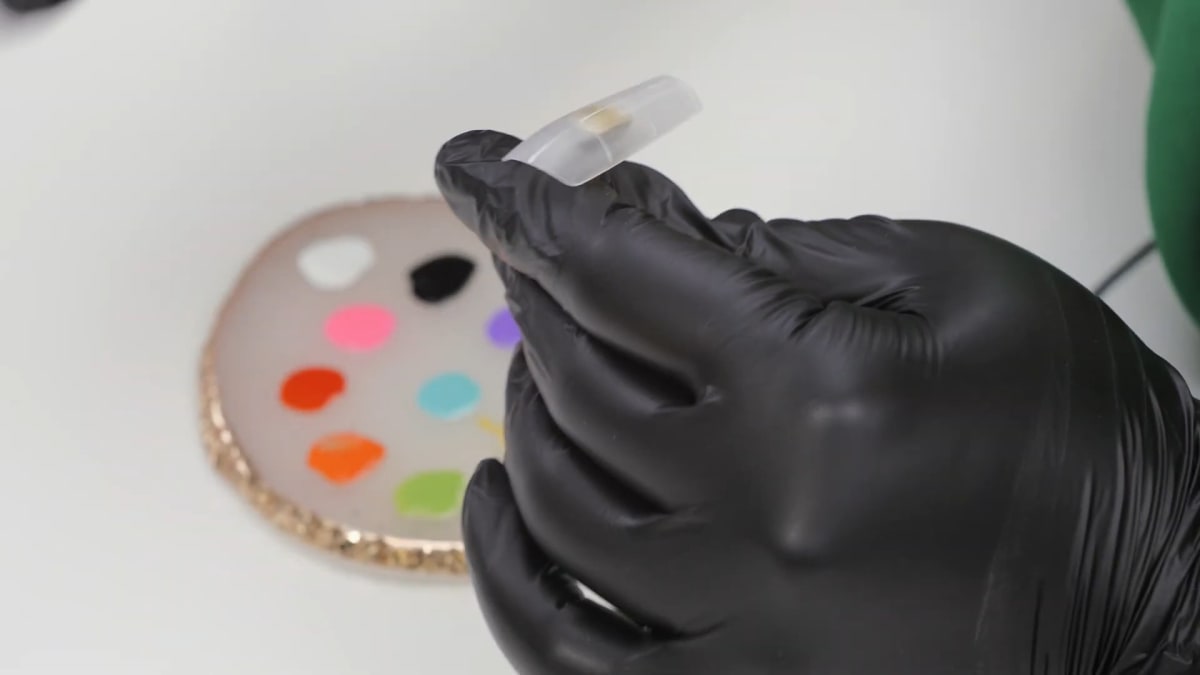
3. Fill in the squares
Do not let squares touch each other while wet, so the gel does not mix. Paint a thin layer of colour on each square with a gel brush, then fill in with the detail brush, since gel sticks well to the layer beneath. Leave the last two squares until later and cure. Watch this step at 7:30
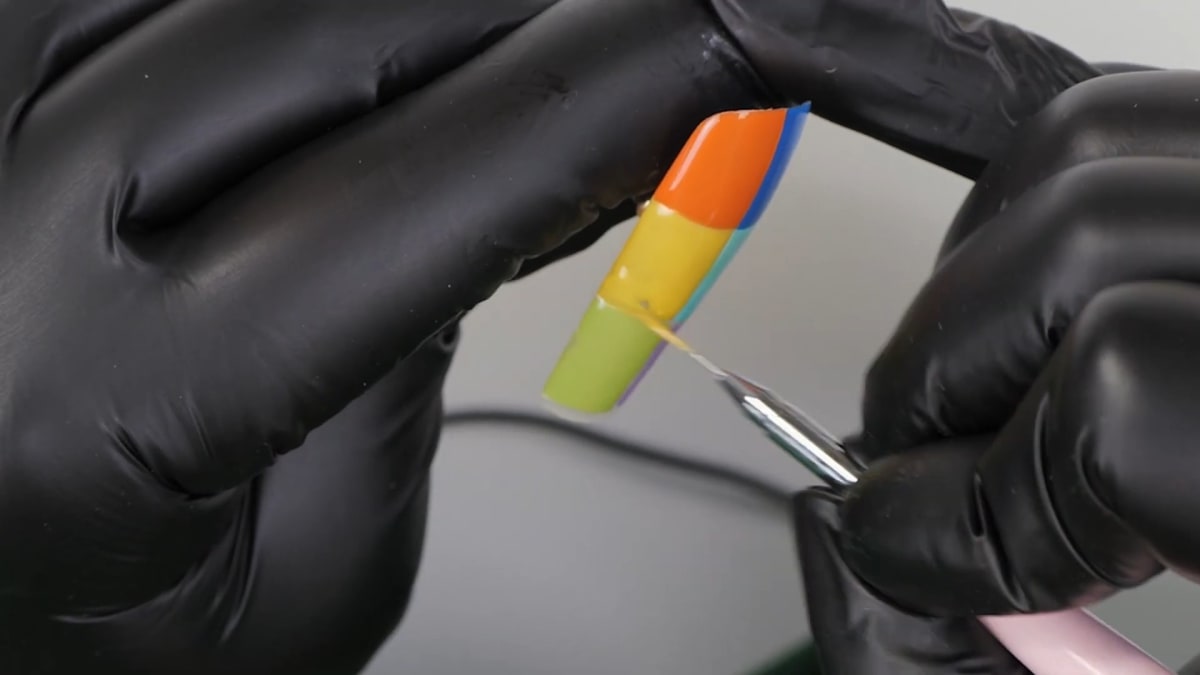
4. Paint the centre of the mouth
Paint an eye shape in Serious Black in each square for the centre of the mouth, trying to keep each shape the same size so the lips look similar. Watch this step at 10:00
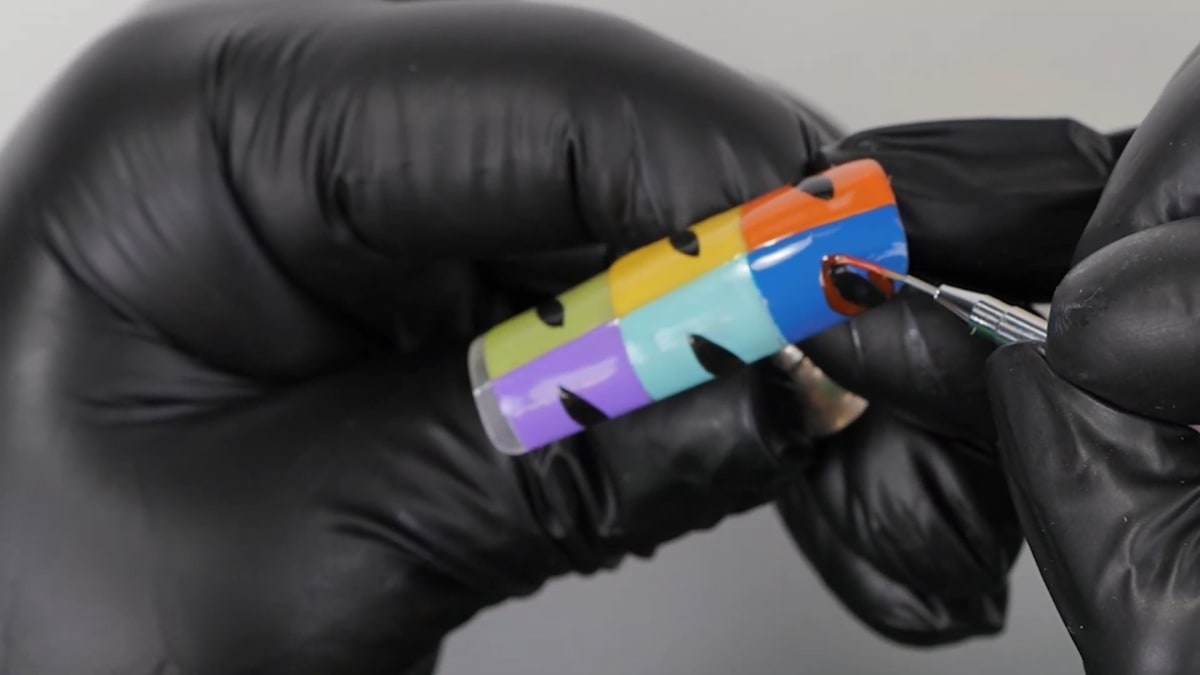
5. Outline the lips
Outline each black shape in a different, contrasting colour, painting the lip and a cupid's bow on the top. Pick random colours and repeat across all squares. This is the heart of the lips nail art. Watch this step at 11:20
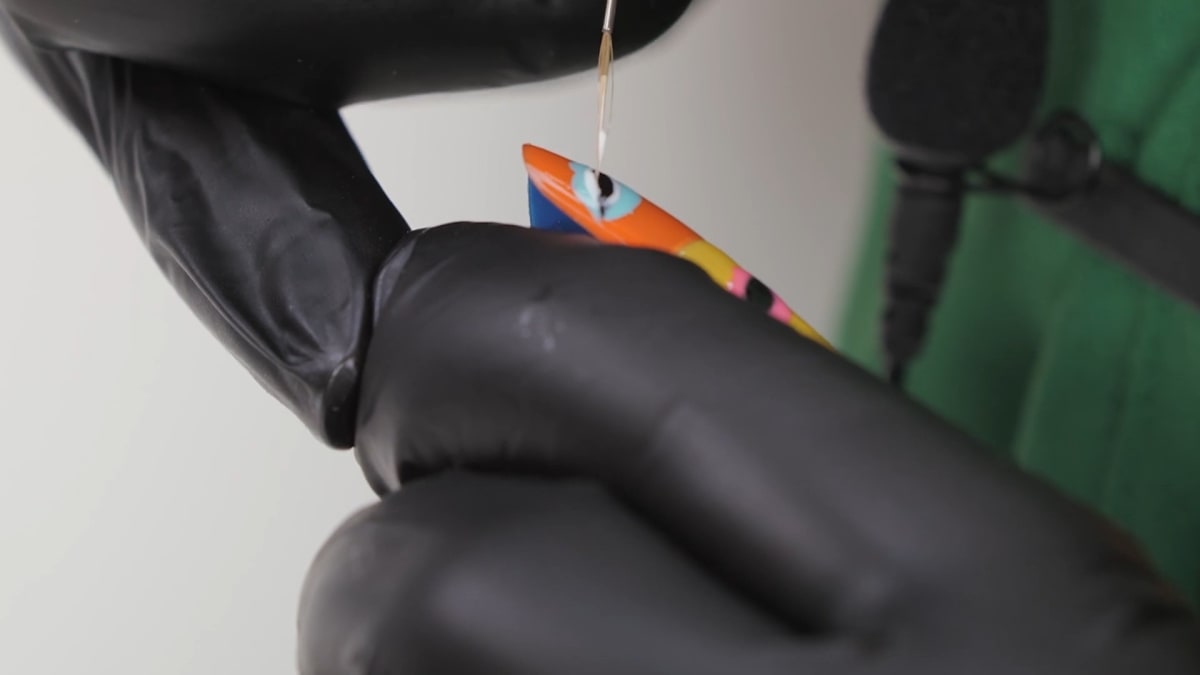
6. Add highlights and teeth
Add detail in white, plus shadows and teeth with black and white gel polish, then finish with a generous coat of Urban Graffiti Top Coat. Watch this step at 13:30
Where to find each stage of the Pop Art Lips Nails video
| Stage | Time |
|---|---|
| Mapping out the grid | 0:40 |
| Setting up the palette | 5:00 |
| Filling in the squares | 7:30 |
| Black mouth centres | 10:00 |
| Outlining the lips | 11:20 |
| Highlights, teeth and top coat | 13:30 |
Pro Tips
- Keep the squares an identical size for the look to work.
- If you want to save time, file the nail to the end so you do not have to paint the two small squares at the bottom.
- Paint the black centre first, so the lips are more likely to look similar in every square.
- Clean the brush between colours.
Who Is This Design For?
This design is for anyone who loves colourful, bold nails and pop art, and works especially well on a long nail. If you enjoy pop art nails, it is a good test of consistency, as the same small shape is painted again and again.
Ways to Make It Your Own
- Choose your own colour palette
- Change the lip colours in each square
- Use a shorter nail with fewer squares
Aftercare
Keep your cuticles moisturised with oil daily and avoid using your nails as tools to protect the finish on your pop art lips nails.
Frequently Asked Questions
How do you paint pop art lips nails?
Draw a grid of equal squares, fill each with a bright colour, paint a black eye shape in the middle of each, outline it with lips in a contrasting colour, then add white highlights and teeth and top coat.
Do the grid lines need to be straight?
No, Steffi says not to stress, because you paint over them.
Why leave squares from touching?
So the gel does not mix and ruin the design.
Why add a thin layer first?
Gel goes well on gel, so the detail brush fills it in more easily.
How do you keep the lips the same in every square?
Paint the black centre of each mouth first, at a similar size, then build the lips around it.
Which colours are used for pop art lips nails?
Tangy Lime, Sun Quenched, Mimosa, Spa Day, Abyss, Wisteria Lane, Heart Breaker and Spill It, with Serious Black and Snow White for the details.
Give Pop Art Lips Nails a Try
Watch the nail art tutorial above, then pick your own colours for your pop art lips nails and share the result.


