



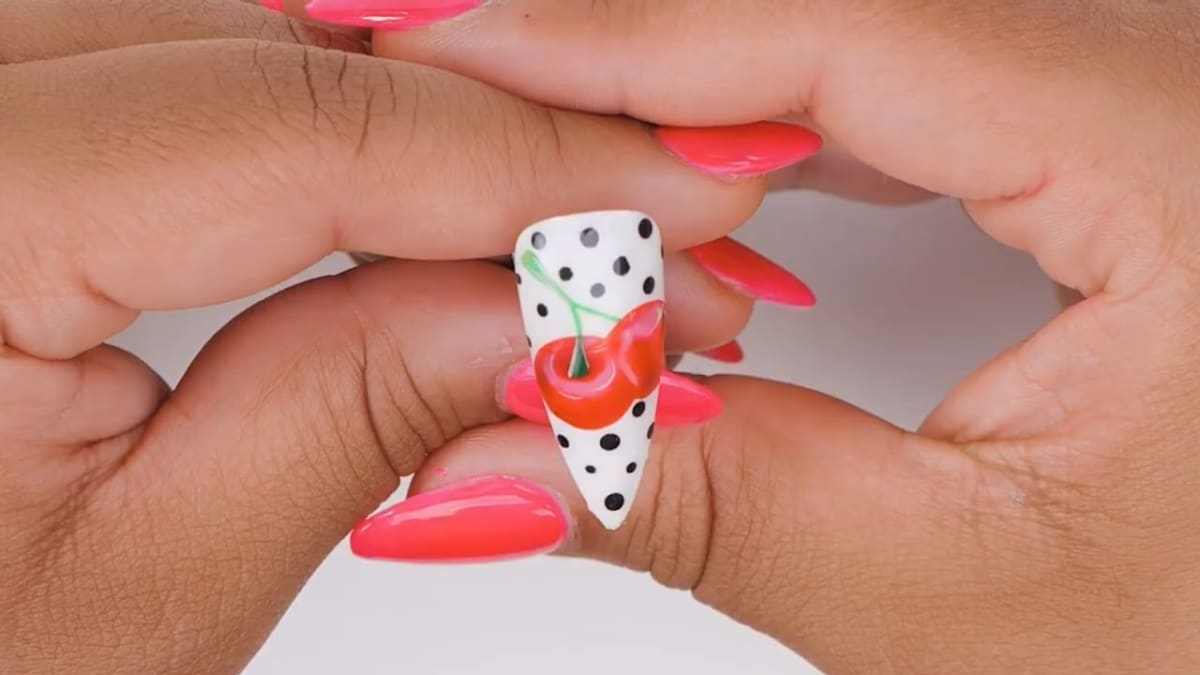
To make realistic cherry nails, you paint two red circles over a white base, then add transparent shadows and soft highlights in gel polish until they look round and glossy. In this short tutorial Steffi does exactly that, finishing the pair of cherries with a hand-painted green stem and a scattering of black polka dots.
The cherries look almost good enough to eat, but the method is simpler than it seems. Every shade is mixed on a palette with a little Top Coat, so there is nothing to buy beyond a handful of gel colours and a detail brush.
If you've wanted to try cherry nail art or learn how to shade with gel colours, this is a quick and fun place to start. Below you'll find the products, each step with its place in the video, Steffi's shading tips and answers to the questions people ask most.
At a Glance
- Design: realistic cherry nails with a black polka dot background
- Artist: Steffi
- Technique: hand-painted gel polish with mixed shading and highlighting
- Skill level: improving painters; a good first realistic design
- Key products: Candy Apple, Urban Temptress, Snow White, Serious Black, Shamrock, Tangy Lime, Top Coat, Ultra Fine Detail Brush
- Video length: 11 minutes, with about 10 minutes of working time shown in real time
Why You'll Love These Realistic Cherry Nails
- A lesson in shading. You'll learn how to add shadows and highlights with gel polish, a skill you can use in all sorts of designs.
- Simple shapes. The cherries start as two red circles.
- Everything is mixed on a palette. A little Top Coat turns your colours into soft, transparent shades.
- Cherries and polka dots. A classic combination that always works.
How Gel Polish Shading Works
Shading means placing a darker, see-through colour where an object would be in shadow, and a lighter one where the light hits it. Gel polish straight from the bottle is too opaque for this, so Steffi thins her colours with Top Coat (or Base Coat) to make them transparent.
Her shadow mix is Urban Temptress with Top Coat and a touch of Serious Black; her highlight mix is Top Coat with a touch of Snow White. Neither black nor white is used neat. Patted onto the cured red circles and pulled slowly, these two mixes are what turn flat shapes into 3D cherry nails.
Products Used in This Video


How to Create Realistic Cherry Nails
1. Paint the background
Steffi wanted the background to be super plain, so she applies a couple of thin coats of Snow White all over the nail. Watch this step at 0:22
2. Prepare your palette
While the nail cures, put a little of each colour on your palette: Candy Apple, Urban Temptress, Tangy Lime, Shamrock, Snow White and some Top Coat for mixing. Watch this step at 0:39
3. Map out the cherries
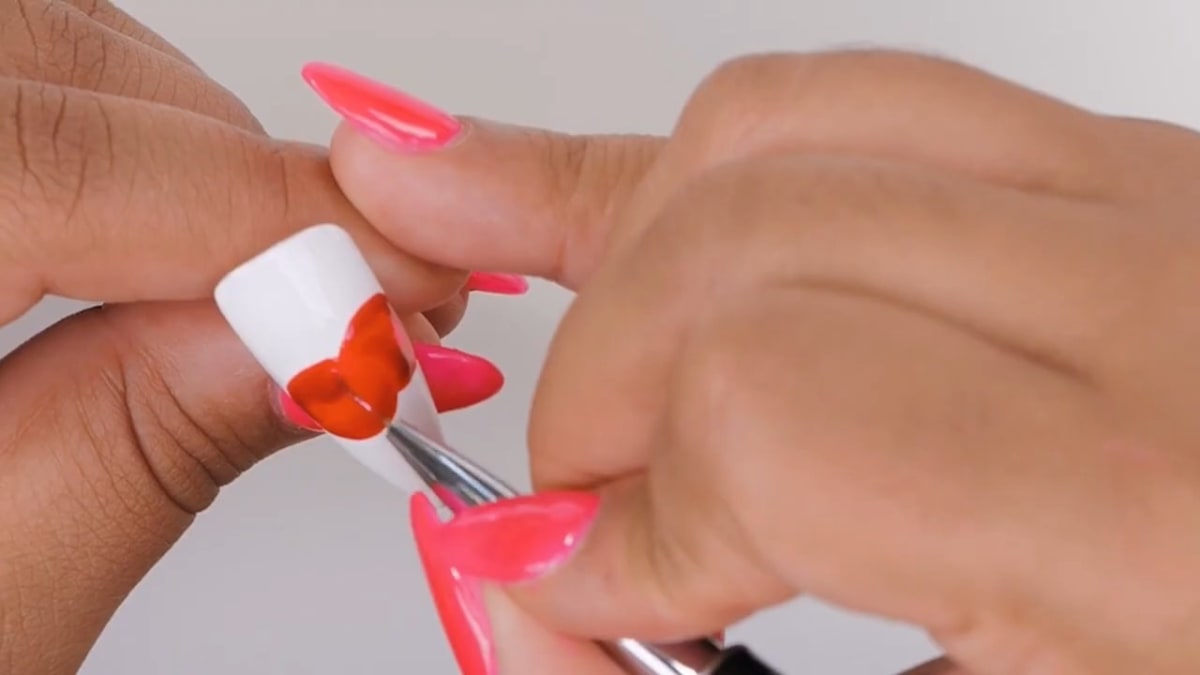
With a detailing brush and Candy Apple, paint a large circle and fill it in. Then add a second round shape just behind it and fill that in too, so there are two red balls on the nail. Cure for 20 seconds. Watch this step at 1:51
4. Add the shadows
Mix Urban Temptress with Top Coat (or Base Coat if you prefer) and add a little Serious Black so it's slightly darker, giving a transparent dark red. Add this to sections of each cherry: a little on top, some where the two cherries meet so they don't merge into each other, and a little at the bottom. Pat and pull slowly to blend as you go. Paint a small dark circle on each cherry where the stem will come out, then cure. Watch this step at 3:28
5. Add the highlights
Mix Top Coat with a little Snow White and add soft highlights to make the cherries look more 3D and realistic. Blend light onto the top of each cherry; this also makes the dark circle look sunken. Cure. This gel polish shading stage is where the realistic cherry nails really come to life. Watch this step at 5:24
6. Paint the stems
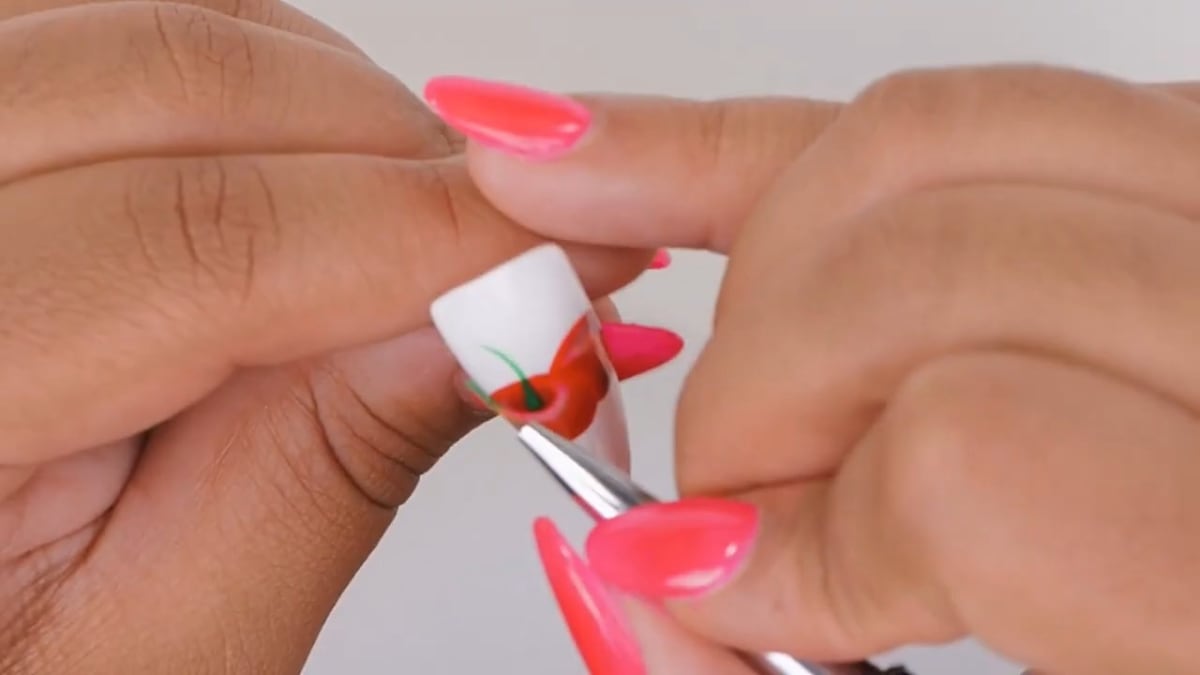
Using Shamrock, paint a line coming out of the first cherry, adding a little more detail at the top, then a thinner line going to the back of the second cherry. Cure. Watch this step at 6:47
7. Add the finishing details
Add a little Tangy Lime on top of the stem as a paler green, then pick up some white and paint really tiny thin lines as highlights, with a little on the outline too. Watch this step at 7:55
8. Polka dots and top coat
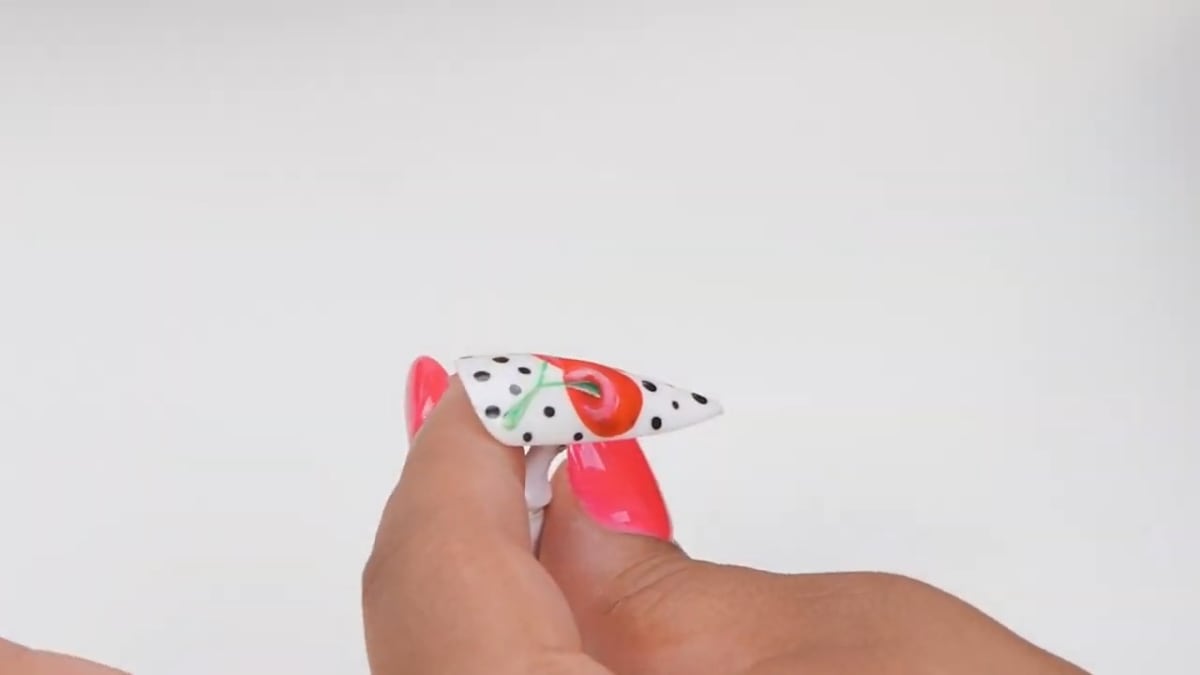
Dot Serious Black polka dots over the background, cure, then apply Top Coat over the whole nail to finish your polka dot nails. Watch this step at 9:24
Where to find each stage of the Realistic Cherry Nails video
| Stage | Time |
|---|---|
| White background | 0:22 |
| Setting up the palette | 0:39 |
| Mapping out the cherries | 1:51 |
| Mixing the shadow colour | 3:28 |
| Shading the cherries | 3:55 |
| Highlights | 5:24 |
| Painting the stems | 6:47 |
| Stem details and white lines | 7:55 |
| Polka dots and top coat | 9:24 |
Pro Tips
- Mix colour with Base Coat or Top Coat for shading. Steffi recommends this for a more realistic look when shading with gel colours.
- Decide where your light is coming from. Keep the highlights on that side of every cherry.
- Pat and pull. Patting the colour on and pulling it slowly gives a soft blend.
- Separate the shapes with shadow. A darker edge between the two cherries stops them merging.
Who Is This Design For?
This is a great design for nail artists who want to practise shading and highlighting on a small, simple subject. The steps are short and clear, so it's also a good first realistic nail art design for improving painters.
Ways to Make It Your Own
- Paint the cherries on one accent nail and polka dots on the rest.
- Change the background colour or the colour of the dots.
- Use the same shading method for other round fruit.
- Leave out the polka dots for a cleaner look.
Aftercare
Apply cuticle oil daily, wear gloves for cleaning and washing up, and avoid using your nails as tools to keep your realistic cherry nails looking glossy.
Frequently Asked Questions
How do you paint realistic cherry nails?
Paint two red circles over a white base, add a transparent dark red for the shadows and a soft white mix for the highlights, then finish with a green stem, black polka dots and Top Coat.
How do you shade with gel polish?
Steffi mixes her colour with Top Coat or Base Coat to make it transparent, then pats and pulls it over the cured base colour.
What makes the cherries look 3D?
A transparent dark red for the shadows and a soft white mix for the highlights, with tiny white lines added at the end.
Which colours do you mix for the shadows and highlights?
The shadow is Urban Temptress with Top Coat or Base Coat and a touch of Serious Black. The highlight is Top Coat with a touch of Snow White.
How do you make the stem look like it sits inside the cherry?
Paint a small dark circle on each cherry where the stem will come out. Adding highlights over the top of the cherry afterwards is what makes that circle look sunken.
Which colours are used for the stem?
Shamrock for the stem with a little Tangy Lime on top as a paler green.
How long do realistic cherry nails take to paint?
The design takes about 10 minutes of working time, shown in real time across an 11-minute video.
Give Realistic Cherry Nails a Try
With a few gel colours and a detail brush you can paint cherries that really pop. Watch Steffi's full nail art tutorial above and have a go at shading and highlighting your own realistic cherry nails.


